With the success of the last dog coat I made, I was asked to make another one - this time, a waterproof coat.
So what fabric do I know that is waterproof? I did have a horse blanket that somebody had sent me, but that wasn't quite what I was after for this project.
So out came the trusty oilcloth.
But what did I want to line it with? I've found that it's always a good idea have two fabrics of similar weights to sew together. But what could I use?
I know! Something that is warm and will dry quickly. Yep! Fleece!
I tinkered with the design a little to make it a good fit.
And here is the end result:
It was easier (and warmer for the dog!) to use fleece for the collar. I couldn't imagine adding a stiff oilcloth collar to it.
And this is the warm, furry underside! Nice enough to wrap yourself in!
I'm hoping to get photos of the coat in action and will add them when I can.
Next...
Showing posts with label oilcloth. Show all posts
Friday, 22 February 2013
Thursday, 24 January 2013
Baby blue oilcloth shopper
I do so love oilcloth - it's so resilient and, well, shiney!
And blue just so happens to be my favourite colour :)
So I put them together and created a spacious shopper with them!
Because I created a bottom in the shopper, it has given it a lovely tapered effect.
I added an enormous pocket inside to put keys, phone/pens and other bits and bobs in. I'm forever losing mine so I suspect that I'm not the only one!
It's quite roomy inside there too!
Next...
And blue just so happens to be my favourite colour :)
So I put them together and created a spacious shopper with them!
Because I created a bottom in the shopper, it has given it a lovely tapered effect.
I added an enormous pocket inside to put keys, phone/pens and other bits and bobs in. I'm forever losing mine so I suspect that I'm not the only one!
It's quite roomy inside there too!
Next...
Wednesday, 16 January 2013
Another oilcloth lunchbag makes its debut...
Lunchbags.
We all need them.
And there's something really stylish about oilcloth.
So put them together and here is the latest Sew Selena designed lunchbag creation.
I don't get bored with using oilcloth because it gives such wonderful results.
Mind you, you have to make sure you know where you're going to sew because you really only get one chance - there's no unpicking with oilcloth because it makes holes that will be there for ever more.
The sides have velcro on them to keep them from splaying open at inopportune moments.
It also has a strap fastening to keep errant sandwiches in their place.
It's really quite spacious in there.
Lined with clear PVC to make it easier to deal with spillages.
I haven't made a lunchbag for a while now so it's always interesting to revisit my notes on how to make them. After much tweaking I'm pretty happy with this design.
Next...
We all need them.
And there's something really stylish about oilcloth.
So put them together and here is the latest Sew Selena designed lunchbag creation.
I don't get bored with using oilcloth because it gives such wonderful results.
Mind you, you have to make sure you know where you're going to sew because you really only get one chance - there's no unpicking with oilcloth because it makes holes that will be there for ever more.
It also has a strap fastening to keep errant sandwiches in their place.
It's really quite spacious in there.
Lined with clear PVC to make it easier to deal with spillages.
Sunday, 18 November 2012
Red, white and blue, we love you
I enjoyed making the Hope chocolate lime oilcloth handbag so much that I thought I would make another one.
But I didn't want to make it exactly the same so I thought I would add a top zip.
After much fun and learning - out came the red, white and blue bag:
What do you think?
I thought the top zip made it look extra special. You might recognise the fabric from my polka dot tea dress - well, you'd be right! I never throw fabric away - you never quite know when even the smallest amount will come in handy!
And I love to know how each piece is connected to another - possibly around the other side of the world.
So why is it called the 'Red, white and blue' bag anyway?
That would be because I lined it with some fabric from a preloved dress:
I know there are no stars and stripes but it does remind me of my American friends.
Next...
But I didn't want to make it exactly the same so I thought I would add a top zip.
After much fun and learning - out came the red, white and blue bag:
What do you think?
I thought the top zip made it look extra special. You might recognise the fabric from my polka dot tea dress - well, you'd be right! I never throw fabric away - you never quite know when even the smallest amount will come in handy!
And I love to know how each piece is connected to another - possibly around the other side of the world.
So why is it called the 'Red, white and blue' bag anyway?
That would be because I lined it with some fabric from a preloved dress:
I know there are no stars and stripes but it does remind me of my American friends.
Next...
Thursday, 18 October 2012
The Hope chocolate lime bag
Take one belt, some oilcloth, a sheet and a little leatherette...
...and you get a Hope handbag in chocolate/lime. Almost good enough to eat!
The interior has a magnetic snap fastening and a phone pocket too.
This lime oilcloth was used in the lime shopper and the sheet was used in the satchel. I always love to think about my creations being connected through their fabric; perhaps around the world.
I thought the preloved belt went nicely with the leatherette patches.
I do love a good bit of top-stitching so the Hope bag is topstitched throughout - I always find it gives it a nice, neat finish.
Ta-dah!
...and you get a Hope handbag in chocolate/lime. Almost good enough to eat!
The interior has a magnetic snap fastening and a phone pocket too.
This lime oilcloth was used in the lime shopper and the sheet was used in the satchel. I always love to think about my creations being connected through their fabric; perhaps around the world.
I thought the preloved belt went nicely with the leatherette patches.
I do love a good bit of top-stitching so the Hope bag is topstitched throughout - I always find it gives it a nice, neat finish.
Ta-dah!
I'm still playing around with the design so watch this space as there will be more on the way...
Next...
Thursday, 11 October 2012
You don't see one for ages and then three show up at once...
Oilcloth. I like it!!!
So I made several more shoppers - all roomy enough for plenty of shopping!
Here's the red polka dot shopper (oh, did I say that I like polka dots too?)
All of the shoppers have taped seams and a snazzy internal pocket. This one just so happens to have red taped seams.
And then there's the sage rose shopper:
Which has flocked leatherette patches on the handles:
And of course a rose print pocket:
And last but not least the 'Time for tea' shopper:
I don't like to make the same thing twice so these shoppers are all unique.
I do like playing with oilcloth!
Next...
So I made several more shoppers - all roomy enough for plenty of shopping!
Here's the red polka dot shopper (oh, did I say that I like polka dots too?)
All of the shoppers have taped seams and a snazzy internal pocket. This one just so happens to have red taped seams.
And then there's the sage rose shopper:
Which has flocked leatherette patches on the handles:
And of course a rose print pocket:
And last but not least the 'Time for tea' shopper:
I don't like to make the same thing twice so these shoppers are all unique.
I do like playing with oilcloth!
Next...
Wednesday, 10 October 2012
Tips on how to sew oilcloth
I went into a fabric shop the other day on the hunt for more oilcloth. I didn't manage to find any but I did come away with some fabulous faux fur, clear PVC and a plethora of zips!
While I was there I put some fabric down on the counter top and wandered off. A customer shouted across the shop to ask if she could have a look at how I had put a zip into some oilcloth (I had cut it out of the bag I was making - it hadn't worked as well as I'd planned)
There began a chat about oilcloth and how to handle it. Here are a few tips if you are planning on playing with oilcloth (and it really is easy peasy if you know how!):
* Use a non-stick teflon foot as normal feet tend to stick to the oilcloth
* Use large stitches and make sure you are sewing in the right direction first - sewing makes holes which don't recover
* Don't pin the oilcloth - use special clips instead (or garden pegs!)
* Go slowly
* Be patient
* It doesn't need to be hemmed
* I like to cover inner seams with bias binding or cotton tape however you could just as easily make French seams
And that's it really. If I think of anything else, I'll let you know.
I even told this lady that I got my oilcloth from Dotty Brown. She was very grateful!
Next...
While I was there I put some fabric down on the counter top and wandered off. A customer shouted across the shop to ask if she could have a look at how I had put a zip into some oilcloth (I had cut it out of the bag I was making - it hadn't worked as well as I'd planned)
There began a chat about oilcloth and how to handle it. Here are a few tips if you are planning on playing with oilcloth (and it really is easy peasy if you know how!):
* Use a non-stick teflon foot as normal feet tend to stick to the oilcloth
* Use large stitches and make sure you are sewing in the right direction first - sewing makes holes which don't recover
* Don't pin the oilcloth - use special clips instead (or garden pegs!)
* Go slowly
* Be patient
* It doesn't need to be hemmed
* I like to cover inner seams with bias binding or cotton tape however you could just as easily make French seams
And that's it really. If I think of anything else, I'll let you know.
I even told this lady that I got my oilcloth from Dotty Brown. She was very grateful!
Next...
Tuesday, 2 October 2012
Big oilcloth handbag fun!
The creative process can sometimes take a long time. Other times it just flows.
This time it just flowed.
So I went from this
To this in 24 hours.
Talk about having big fun!
I kinda figured it out as I went along and I always make sure that I take copious notes of how I've made it so that I can always make something similar again.
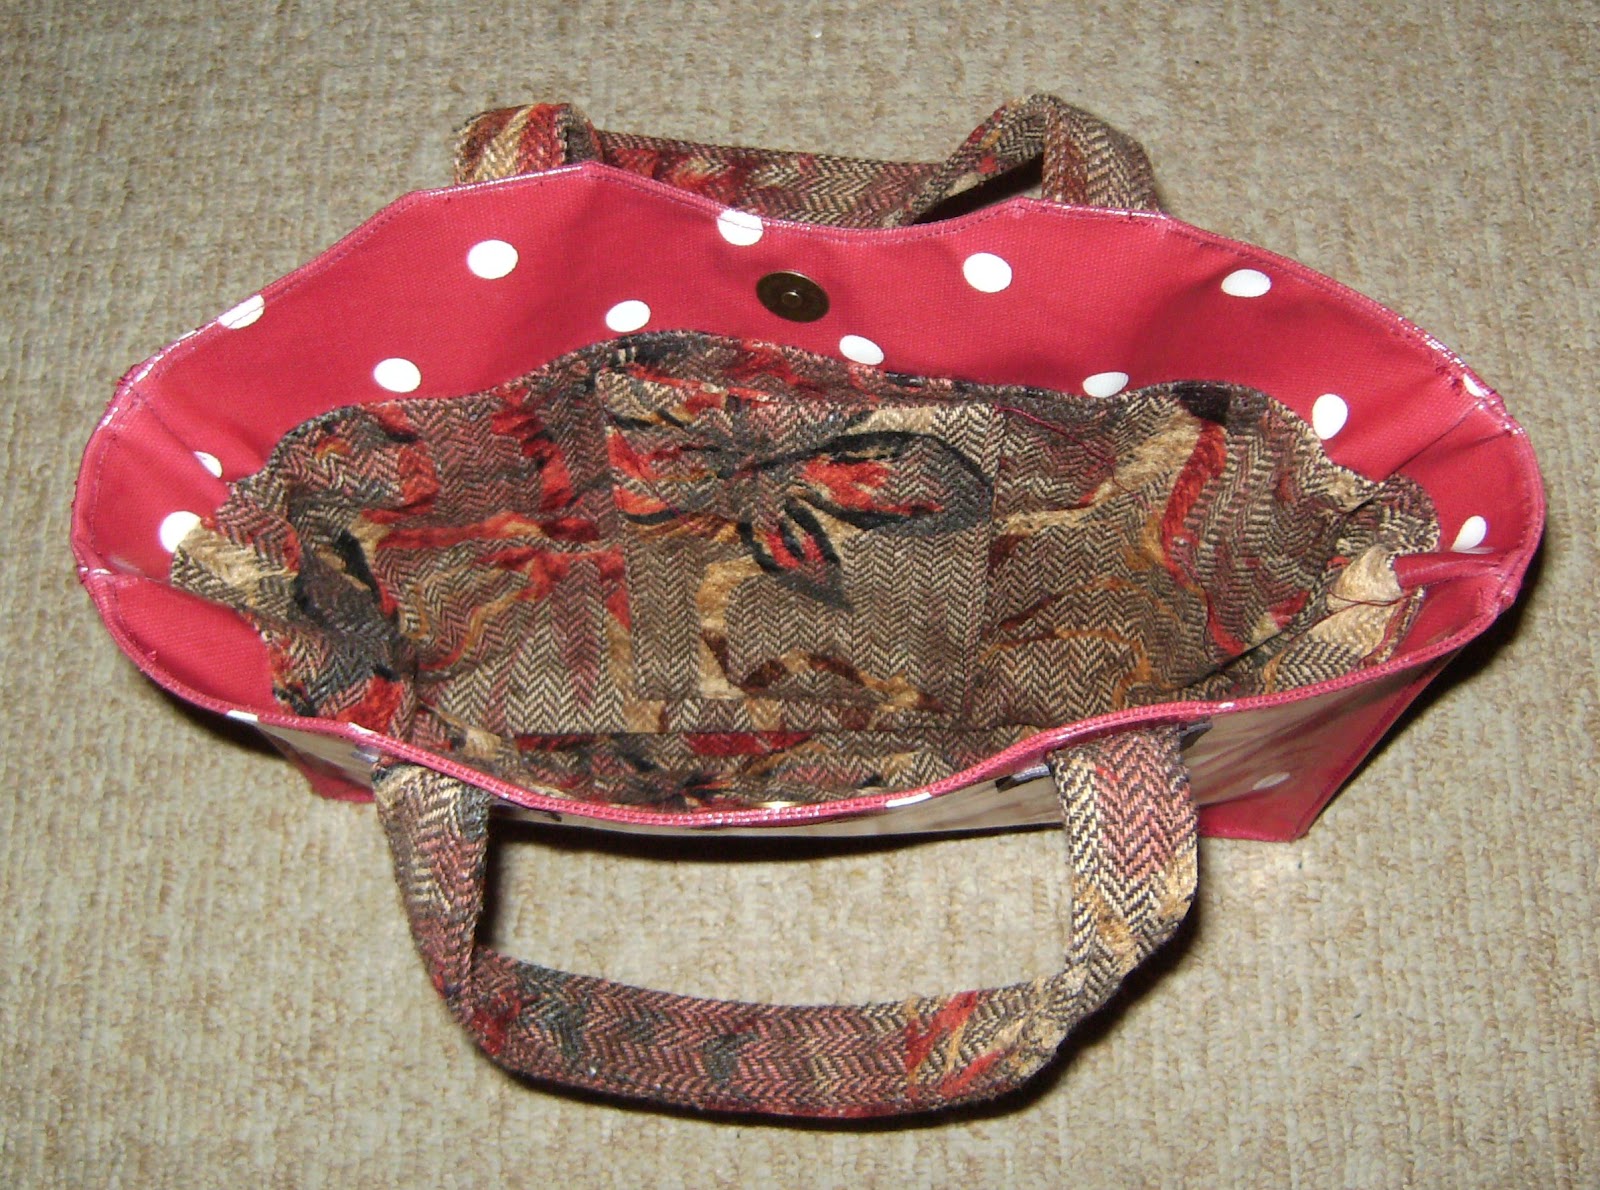
The handles and interior were taken from a preloved tweedy skirt. And the leatherette patches were from the dining room chair re-cover adventure from several years ago.
I used brand new antique gold-look magnetic snap fasteners to hold the top together. Next time round I think I might put in a zip instead. I love how I can tweak it every time!
There is actually a pocket in there too - I added a pack of tissues to illustrate where it is!
The oilcloth wasn't sturdy enough and did funny bendy things when it stood up so I added French seams to the sides and bottoms to give it extra strength.
And guess what? It stands up all on its own now heh heh!
Next...
This time it just flowed.
So I went from this
To this in 24 hours.
Talk about having big fun!
I kinda figured it out as I went along and I always make sure that I take copious notes of how I've made it so that I can always make something similar again.
The handles and interior were taken from a preloved tweedy skirt. And the leatherette patches were from the dining room chair re-cover adventure from several years ago.
I used brand new antique gold-look magnetic snap fasteners to hold the top together. Next time round I think I might put in a zip instead. I love how I can tweak it every time!
There is actually a pocket in there too - I added a pack of tissues to illustrate where it is!
The oilcloth wasn't sturdy enough and did funny bendy things when it stood up so I added French seams to the sides and bottoms to give it extra strength.
And guess what? It stands up all on its own now heh heh!
Next...
Wednesday, 19 September 2012
More oilcloth adventures
Now I've got the hang of it, I do love using oilcloth!
There's something ever so satisfying about its look and feel. And they always look fab too.
This bag was created with no pattern, I simply used my bag-making skills to fashion it into the desired shape.
I lined the interior of the bag with a pink polka dot dress which I thought went nicely with the rose print.
I added a pocket and magnetic snap fastening too.
One lucky lady snapped this bag up as soon as I'd made it.
Righto - on to the next...
There's something ever so satisfying about its look and feel. And they always look fab too.
This bag was created with no pattern, I simply used my bag-making skills to fashion it into the desired shape.
I lined the interior of the bag with a pink polka dot dress which I thought went nicely with the rose print.
One lucky lady snapped this bag up as soon as I'd made it.
Righto - on to the next...
Wednesday, 22 August 2012
Seaside shopper
A couple of weeks ago I purchased a few pieces of oilcloth for a new project or three. I do like working with oilcloth - it's so darned durable once you know how to treat it!
This is the first project that I made - a large seaside shopper:
It's large enough to carry all manner of things home from a shopping expedition - or even a day at the beach!
I decided to bind the inside seams to keep them nice and neat and tidy.
And because it's not always easy to find my phone or purse or other important but small items, I added an inside pocket too.
I'm really happy with the way it turned out!
Righto - on to the next project!
This is the first project that I made - a large seaside shopper:
It's large enough to carry all manner of things home from a shopping expedition - or even a day at the beach!
I decided to bind the inside seams to keep them nice and neat and tidy.
And because it's not always easy to find my phone or purse or other important but small items, I added an inside pocket too.
I'm really happy with the way it turned out!
Righto - on to the next project!
Monday, 30 April 2012
The joys of working with Mexican oilcloth
I love working with oilcloth - it's so darned versatile!
I'm still in the 'playing' stage as I've discovered that there's oilcloth and then there's *oilcloth*.
It's a bit like life really - the more I learn about something, the more I realise there is to learn!
I'd not heard of Mexican oilcloth before I went looking for UK oilcloth suppliers - but look at it - it's so vibrant! Apparently the floral designs are inspired by traditional 1940s/1950s patterns.
Here is a hibiscus shopper that I made for a friend:
The interior seams are taped with green bias binding in order to a) make it look great and b) provide added strength (a tip from my favourite local sewing shop!)
I'm still in the 'playing' stage as I've discovered that there's oilcloth and then there's *oilcloth*.
It's a bit like life really - the more I learn about something, the more I realise there is to learn!
I'd not heard of Mexican oilcloth before I went looking for UK oilcloth suppliers - but look at it - it's so vibrant! Apparently the floral designs are inspired by traditional 1940s/1950s patterns.
Here is a hibiscus shopper that I made for a friend:
It's so roomy in there!
The pattern on the back was slightly offset to distinguish it from the front.
The interior seams are taped with green bias binding in order to a) make it look great and b) provide added strength (a tip from my favourite local sewing shop!)
Wednesday, 14 March 2012
Oilcloth totes and Sew Selena labels
You may remember that a couple of months ago I blogged about a tote bag that I had made from oilcloth.
Well.... it now has a Sew Selena woven label on it so it is officially complete!!
What do you think?
Well.... it now has a Sew Selena woven label on it so it is officially complete!!
What do you think?
Wednesday, 18 January 2012
Grace lunchbags
I have a thing about lunchbags.
Actually, I have a lot of 'things' about a lot of things!
The reason I made it?
I couldn't find a lunchbag that would keep a tupperware container up the right way.
So I made one.
Why a lunchbag?
I take my lunch with me here, there and everywhere. Being able to do the food on the go is really important to me. And a bit of floral styling never went amiss either!
So I put the versatility of oilcloth to good use by creating the Grace lunchbag:
Actually, I have a lot of 'things' about a lot of things!
The reason I made it?
I couldn't find a lunchbag that would keep a tupperware container up the right way.
So I made one.
Why a lunchbag?
I take my lunch with me here, there and everywhere. Being able to do the food on the go is really important to me. And a bit of floral styling never went amiss either!
So I put the versatility of oilcloth to good use by creating the Grace lunchbag:
The inside has been lined with clear vinyl tablecloth to make it not only easier to clean but also to make it much stronger.
And I've used velcro to fasten the top and sides to keep everything exactly where it should be!
I made this bag for a friend but I can't wait to make one for myself now!
Monday, 16 January 2012
Oilcloth tote
I haven't used oilcloth before.
It always struck me as being a bit tricky to work with and a bit on the expensive side to just play around with so when a friend asked me to make a tote out of oilcloth I said 'sure, no problem!'
With the addition of a non-stick sewing foot, larger stitch length and a bit of imagination, here's what I created:
And it's huge - plenty of room for whatever you should possibly want to carry in there! It has a longer than average handle so that it can be carried as a shoulder bag if need be.
And interestingly it wasn't tricky to sew at all, just a little bit of TLC needed together with a go-slowly warning and it worked like a dream.
I've taped the interior seams to give them extra strength and durability too.
I've also road-tested it and it was able to carry the entire number of cans in our cupboards (17) with ease.
So that's approximately 17 lots of 400g = very heavy!
Those seams aren't going anywhere!
I've been a little reluctant to post it here as it's missing something really important - a Sew Selena label. I'm in discussions with a graphic designer as we speak...
It always struck me as being a bit tricky to work with and a bit on the expensive side to just play around with so when a friend asked me to make a tote out of oilcloth I said 'sure, no problem!'
With the addition of a non-stick sewing foot, larger stitch length and a bit of imagination, here's what I created:
And it's huge - plenty of room for whatever you should possibly want to carry in there! It has a longer than average handle so that it can be carried as a shoulder bag if need be.
And interestingly it wasn't tricky to sew at all, just a little bit of TLC needed together with a go-slowly warning and it worked like a dream.
I've taped the interior seams to give them extra strength and durability too.
I've also road-tested it and it was able to carry the entire number of cans in our cupboards (17) with ease.
So that's approximately 17 lots of 400g = very heavy!
Those seams aren't going anywhere!
I've been a little reluctant to post it here as it's missing something really important - a Sew Selena label. I'm in discussions with a graphic designer as we speak...
Subscribe to:
Posts (Atom)